Hello flutter developer, In this blog, we shall discuss how we can use GetX the package for managing the state of pagination. Pagination is also known as paging, is the process of dividing a document into discrete pages. Today in most of the apps we see this feature. It helps in improving the performance of the app. Through pagination we can reduce the read request to our database, hence it reduces the cost of database maintenance. It is a user-friendly feature, interested users can scroll more and more if they deliberately want to load more data.
In this blog, we shall learn how we can implement pagination using GetX the package. We will build an app that will display a fixed number of items and on scrolling more data will be loaded and displayed on the screen in real-time.
GetMaterialApp is a widget that is a substitute for MaterialApp. Using this widget is not compulsory if you are using the GetX package only for state management, but if you are using GetX for routing then we need to use GetMaterialApp widget.
What do we want?
We want to build an app that displays a list of items and every time the screen scroll it should automatically add some items to the existing list and update the UI in real-time.
Creating a model class:
We have created a very simple model class that has a name property.
class Model {
String name;

Model({
this.name,
});
}
Creating GetxController:
GetxController is a class in which we write all our business logic, variables, and methods used for managing the state of the app screen.
It automatically disposes of all the controllers when the screen is popped out of the stack.
All the processing logic will be written inside this controller.
Like initState() and dispose() method GetX provides us onInit() and onClose() .
onReady() is called after the widget is rendered on screen.
update() rebuilds the GetBuilder associated with the GetxController. It is similar to notifyListeners() in providers.
onInit(): called after the widget is allocated memory.
onClose() called just before the controller is deleted from memory.
class HomePageController extends GetxController {
}
We can create a GetxController by extending the class with GetxController like above.
Initialize the required objects:
We need ScrollControllerto listen to the scrolling of the screen.
list is a list of Models that will be used to map it with the list of widgets.
class HomePageController extends GetxController {
List<Model> list = [];
ScrollController controller = ScrollController();
int listLength = 6;
}
Generating initial list:
Here we have generated a list of Model that we will initially display on the screen. List.generate() takes an integer and function with an integer value. It will add Model for each index in the list.
Creating a method executed every time the scroll limit exceeds its limit:
This method will be executed every time the scroll limit exceeds its limit.
To measure the scroll limit we use the ScrollController. maxScrollExtentis the number of max pixels and pixelsnotify when the listener when the pixel changes. controller.position.maxScrollExtent == controller.position.pixelsthis condition will only return true when the scrolling is max.
addItems() async {
controller.addListener(() {
if (controller.position.maxScrollExtent == controller.position.pixels) {
for (int i = 0; i < 2; i++) {
listLength++;
list.add(Model(name: (listLength).toString()));
update(); //update GetBuilder each time
 }
}
});
}
GetBuilder is rebuilt every time the update() the method is called. It takes the init controller. It takes a builder that returns a Widget. The methods and objects can be accessed using the value . We use the ListView.builderto display the list of widgets. Controller of ListView.builderwill be the ScrollController.
You might be thinking that here we do not need the GetBuilder as the method of homePageController can be accessed without it as well, yes it is true but in this case, the UI will not be updated, the 2 Model will be added into the list an object that we have created in the HomePageControllerusing the addItems() method. To change the UI we need to use GitBuilder if we are using get for state management as it is rebuilt every time the update() the method is called.
Trusted across industries like manufacturing, healthcare, logistics, BFSI, and smart cities, Aeologic combines innovation with deep industry expertise to deliver future-ready solutions.
Feel free to connect with us: And read more articles fromFlutterDevs.com
FlutterDevs team of Flutter developers to build high-quality and functionally-rich apps. Hire a flutter developer for your cross-platform Flutter mobile app 987tr project on an hourly or full-time basis as per your requirement! You can connect with us on Facebook, GitHub, Twitter, and LinkedIn for any flutter-related queries.
Wewelcome feedback and hope that you share what you’re working on using #FlutterDevs. We truly enjoy seeing how you use Flutter to build beautiful, interactive web experiences!.
Flutter, renowned for its expedited development and aesthetically pleasing user interfaces, has been gaining traction among developers for crafting cross-platform applications. With the advent of Flutter Web, developers can now extend their existing Flutter expertise to target web browsers as well. A pivotal aspect of Flutter Web development is JavaScript integration, which facilitates interaction between developers’ applications and the underlying web platform. In this blog, we’ll delve into the realm of JavaScript integration in Flutter Web, exploring its significance, applications, pros and cons, limitations, future scope, best practices, and more.
If you’re looking for the best Flutter app development company for your mobile application then feel free to contact us at — support@flutterdevs.com.
Google’s UI toolkit for building natively compiled applications for mobile, web, and desktop from a single codebase, has garnered widespread acclaim. Flutter Web extends Flutter’s capabilities to target modern web browsers, empowering developers to create interactive web applications with the same codebase they use for mobile and desktop platforms. Equipped with Flutter’s declarative UI framework and hot reload feature, developers can craft web applications with stellar performance and rapid development cycles.
Pros:
Enables access to browser APIs and third-party JavaScript libraries.
Facilitates seamless integration of existing web technologies.
Enhances the functionality and interactivity of Flutter Web applications.
Cons:
Introduces complexity and potential errors when interacting with JavaScript code.
May increase application size and affect performance if not optimized properly.
Requires understanding of both Dart and JavaScript languages for effective integration.
Leveraging JavaScript in Flutter Web
Using JavaScript in Flutter Web allows developers to leverage existing web technologies and libraries while building web applications with Flutter. Here are some reasons why integrating JavaScript into Flutter web can be beneficial:
Access to Web APIs: JavaScript provides access to a wide range of web APIs and browser functionalities that may not be directly available in Flutter. By integrating JavaScript, developers can tap into these APIs and leverage features such as geolocation, device orientation, and more.
Third-Party Libraries: Many third-party libraries and frameworks are written in JavaScript and designed for web development. Integrating JavaScript in Flutter web allows developers to use these libraries seamlessly within their Flutter applications, expanding the range of available tools and resources.
Web-specific Functionality: Certain web-specific functionality, such as interacting with the browser’s Document Object Model (DOM) or handling events like mouse clicks and keyboard input, can be more efficiently implemented using JavaScript. Integrating JavaScript in Flutter web enables developers to handle these tasks effectively.
Hybrid Development: In some cases, developers may want to build hybrid applications that combine Flutter components with existing web content or JavaScript-based frameworks like React or Angular. Integrating JavaScript in Flutter web facilitates the creation of hybrid applications that leverage the strengths of both Flutter and web technologies.
Legacy Code Integration: For projects that involve migrating or integrating with existing web applications or codebases, using JavaScript in Flutter web can streamline the integration process and ensure compatibility with legacy systems.
Overall, integrating JavaScript in Flutter web opens up new possibilities for building feature-rich, interactive web applications that leverage the strengths of both Flutter and web technologies.
Introduction to JavaScript Integration
JavaScript integration serves as a cornerstone in Flutter Web development, facilitating seamless communication between Flutter code and the underlying web platform. By harnessing JavaScript interop, developers can access browser APIs, incorporate third-party JavaScript libraries, and execute other web-specific tasks from within their Flutter applications. In Flutter, JavaScript interop is realized through the dart:js library, which establishes a bridge between Dart and JavaScript environments.
import 'dart:js' as js;void main() {
js.context.callMethod('console.log', ['Hello from Dart!']);
}
Use Cases for JavaScript Integration
JavaScript integration in Flutter Web unlocks a myriad of possibilities for developers. Common applications include accessing browser APIs like geolocation or local storage, integrating third-party JavaScript libraries for enhanced functionality, and interfacing with web services via JavaScript functions. By seamlessly integrating JavaScript code into their Flutter applications, developers can leverage existing web technologies to enrich the user experience.
dartCopy code// Example of accessing browser's geolocation API using JavaScript interop
void getCurrentLocation() {
var position = js.context.callMethod('getCurrentPosition', []);
// Process position data
}
Interfacing with JavaScript Code
Interfacing with JavaScript code in Flutter Web entails invoking JavaScript functions from Dart and vice versa. With dart:js, developers can invoke JavaScript functions and exchange data between Dart and JavaScript environments. This bidirectional communication empowers developers to seamlessly integrate JavaScript functionalities into Flutter applications, thereby harnessing the full potential of the web platform.
dartCopy code// Example of invoking a JavaScript function from Dart code
void callJavaScriptFunction() {
js.context.callMethod('myJavaScriptFunction', ['argument']);
}
Integrating Third-Party JavaScript Libraries
Flutter Web developers can tap into the expansive ecosystem of third-party JavaScript libraries to augment their applications. Integration of these libraries into Flutter projects is facilitated through JavaScript interop. Whether it involves data visualization with Chart.js or DOM manipulation with jQuery, developers can seamlessly incorporate popular JavaScript libraries into their Flutter Web applications and leverage their robust features.
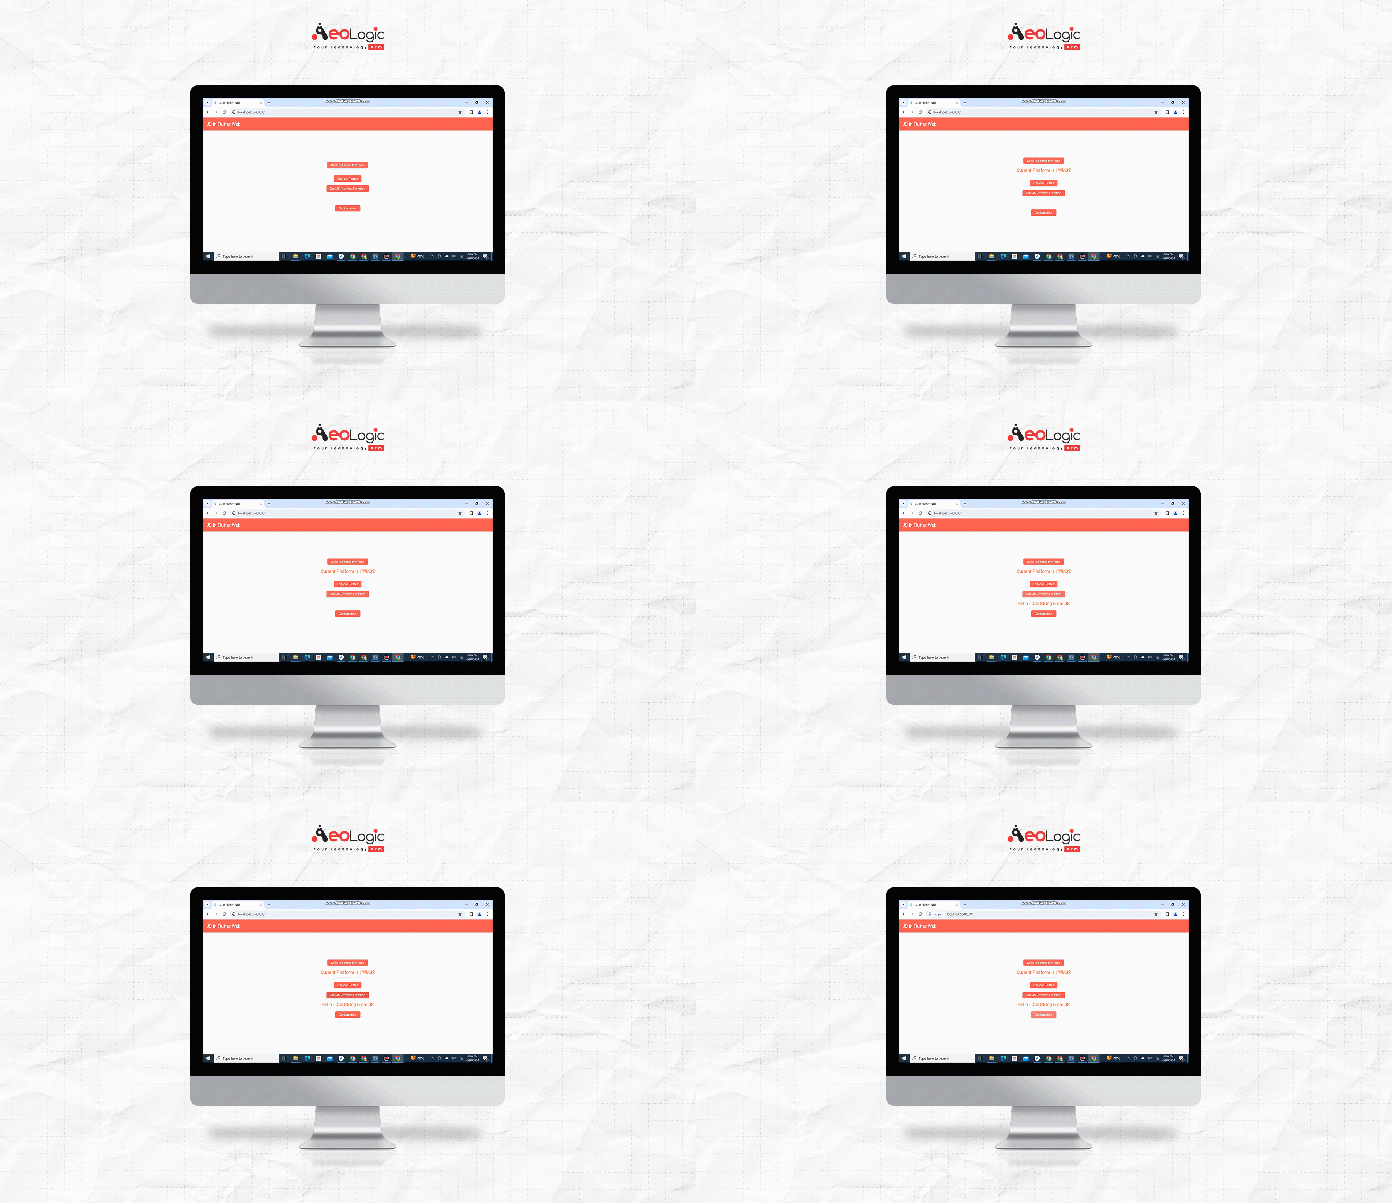
Demo: Retrieving User’s Location
To demonstrate JavaScript integration in Flutter Web, let’s create a simple application that retrieves the user’s location using JavaScript’s geolocation API:
To get geolocation using JavaScript in Flutter Web, we can use the Geolocation API provided by modern web browsers. Here’s a step-by-step guide:
Step 1: Import dart:js Libraryi
mport 'dart:js' as js;
Step 2: Call JavaScript Geolocation API
void getLocation() {
if (js.context.hasProperty('navigator') &&
js.context['navigator'].hasProperty('geolocation')) {
js.context.callMethod('navigator.geolocation.getCurrentPosition',
[showPosition, showError]);
} else {
print('Geolocation is not supported by this browser.');
}
}
Dependency on the user’s device and browser settings.
Limited support in some older browsers or in environments where geolocation services are restricted.
Geolocation accuracy may vary based on factors such as device capabilities, network conditions, and user consent.
Privacy concerns may arise due to the collection of location data from users.
JavaScript Functions
Flutter Web provides developers with the capability to seamlessly integrate custom JavaScript functions into their applications, thereby extending the functionality and interactivity of their web experiences. Let’s explore some JavaScript functions that can be effectively integrated into Flutter Web applications.
1. getPlatform(): This function leverages JavaScript’s navigator.platform to retrieve essential platform information. By accessing the user’s device platform, developers can tailor their application’s behavior to provide a more personalized experience. For example, they can adjust layout, content, or feature availability based on whether the user is on a desktop, mobile device, or tablet.
function getPlatform() {
return navigator.platform;
}
Usage Scenario: Adapting UI layout and feature availability based on whether the user is on a desktop, mobile device, or tablet.
2. jsPromiseFunction(message): Demonstrating the usage of JavaScript promises within Flutter Web, this function showcases the power of asynchronous programming. Promises enable developers to handle asynchronous operations more efficiently, such as fetching data from a server or executing time-consuming tasks. By integrating JavaScript promises into Flutter Web applications, developers can ensure smooth and responsive user interactions, even when dealing with complex asynchronous tasks.
async function jsPromiseFunction(message) {
let promise = new Promise(function(resolve, reject) {
resolve('Hello : ' + message);
});
let result = await promise;
return result;
}
Usage Scenario: Fetching data from a server or executing complex tasks asynchronously while maintaining app responsiveness.
3. jsOpenTabFunction(url): By employing this function, developers can enhance user navigation within their Flutter Web applications. It opens a new browser tab with the specified URL and resolves a promise when the tab is closed. This functionality is particularly useful for scenarios where users need to interact with external content or perform tasks in parallel without disrupting their current workflow. For instance, developers can implement features like opening documentation pages, external links, or multimedia content in separate tabs, providing users with a seamless browsing experience.
async function jsOpenTabFunction(url) {
let promise = new Promise(function(resolve, reject) {
var win = window.open(url, "New Popup Window", "width=800,height=800");
var timer = setInterval(function() {
if (win.closed) {
clearInterval(timer);
resolve('Closed');
}
}, 300);
});
let result = await promise;
return result;
}
Usage Scenario: Opening external links, documentation pages, or multimedia content in separate tabs without interrupting the user’s workflow.
Integrating these JavaScript functions into Flutter Web applications empowers developers to leverage the full potential of web technologies and browser capabilities. Whether it’s accessing device-specific information, handling asynchronous tasks, or enhancing navigation, JavaScript integration opens up a world of possibilities for crafting rich and immersive web experiences with Flutter.
While JavaScript integration in Flutter Web offers numerous benefits, it also comes with certain limitations. These include potential compatibility issues with future Flutter versions, overhead associated with maintaining JavaScript interoperability, and limitations in accessing certain browser APIs directly from Dart code. However, with ongoing improvements in Flutter Web and Dart language features, these limitations are expected to diminish over time. Additionally, the future scope of JavaScript integration in Flutter Web holds promise for further enhancing web application development, with potential advancements in performance optimization, tooling support, and expanded JavaScript interoperability.
Conclusion:
JavaScript integration plays a pivotal role in Flutter Web development, empowering developers to harness the capabilities of the web platform within their Flutter applications. By comprehending the fundamentals of JavaScript interop and exploring its applications, developers can craft resilient and feature-rich web applications with Flutter. As Flutter Web continues to evolve, JavaScript integration will remain instrumental, enabling developers to create immersive and captivating user experiences on the web.
References:
Official Flutter Documentation: Flutter Web
Dart Documentation: JavaScript Interop
In this blog, we’ve delved into the intricacies of JavaScript integration in Flutter Web, from its significance and applications to pros and cons, limitations, future scope, best practices, and more. Armed with this knowledge, developers can confidently explore and leverage JavaScript integration to craft innovative web applications with Flutter.
❤ ❤ Thanks for reading this article ❤❤
If I need to correct something? Let me know in the comments. I would love to improve.
Trusted across industries like manufacturing, healthcare, logistics, BFSI, and smart cities, Aeologic combines innovation with deep industry expertise to deliver future-ready solutions.
Feel free to connect with us: And read more articles fromFlutterDevs.com.
FlutterDevs team of Flutter developers to build high-quality and functionally rich apps. Hire a Flutter developer for your cross-platform Flutter mobile app project on an hourly or full-time basis as per your requirement! For any flutter-related queries, you can connect with us on Facebook, GitHub, Twitter, and LinkedIn.
Wewelcome feedback and hope that you share what you’re working on using #FlutterDevs. We truly enjoy seeing how you use Flutter to build beautiful, interactive web experiences.
Firebase Database is one of the best platforms for data storage in this we Firebase adds up messaging to the collection of products on the Firebase console. In-App Messaging connects all the active users who are already using our app. It sends a relevant message to the user and helps in interconnection and encourages users to use the feature of the app.
Hello friends, I will talk about my new blog on Explore Firebase In-App Messaging In Flutter. We will also implement a Firebase In-App Messaging In Flutter demo, describe his properties, and use them in your flutter applications. So let’s get started.
Firebase In-App Messaging As the name suggests it works to send messages as I mentioned above it allows to send messages to all the active users as we have one application then the user To increase interconnection with each other, we send a message in the application to encourage the user to do something.
If a message can be configured dynamically so that the application will not need to update the message frequently, thereby prompting the active user to complete all the functions of in-app messaging by sending the message.
For Example:
Like buying an item or subscribing to content. This is also connected to firebase analytics and prediction to help you give custom and advance targeted messaging based on individual interest or engagement.
Demo Module :
Implementation :
You need to implement it in your code respectively :
Step 4: Classpath add to the[project]/android/build.gradlefile.
In-App Messaging Android Setup:
In your project-level build.gradle file, make sure to include Google’s Maven repository in both your buildscriptand allprojects sections.
Add the dependency for the In-App Messaging Android library to your module (app-level) Gradle file (usually app/build.gradle):
dependencies {
  // Add the google services classpath
  classpath 'com.google.gms:google-services'
}
Configuring Firebase Project:
To configure the project in firebase we will open the firebase console from which we will configure our project in-app messaging from which we will get a google service.json file which contains the configuration data that firebase uses internally To achieve this, we need a Firebase project so that we can further configure the project in Firebase, let’s see it in detail below.
Now we will open the firebase console to create a new project then click on add project card for the new firebase project, as soon as we click on the card, a new dialog opens in which we will set the name of our project and set the analytics location accordingly. As soon as we set the name of our project, then we will click on the Create Project button below.
for example, as shown in the image below.
After completing the first step a success message will appear indicating that we are ready for a new project
After this, in the next step, it asks whether you want to enable Google Analytics for the Firebase project or not, if yes, then enable it, although it is enabled by default, that click on the Continue button below to go to the next step
In the next step, you will enter the package name of the project by the way you can also enter the alias of the application Debug Certificate SHA-1.
After that the next step will come in the download config file, we will see there is a button on which to download google. Wrote service.json on which we will click and download it and add it to our flutter project.
Create Campaign:
When we create a new campaign then for that we have to open the firebase console after that these apps will navigate to messaging if any campaign is not in the account then click on create first campaign button and create a new campaign.
for example, as shown in the image below.
As soon as we click on the button then we are redirected to a new page now you can substitute a new campaign where we can choose the layout of our message what kind of message layout we want to make main It has 3 different layouts Model Image and Banner Message All of them have the same functionality and behavior.
Create a Campaign Message Properties:
Background: Using the background property, we can change the background of our dialog with a new color.
Text Colour: You can change the color of your given text in the text color property.
Title: The title attribute is a type of title text that we display in a campaign.
Body (Optional): The body property is used to display the main message of any dialog. This is optional.
Image URL (Optional): We use the image URL property when we want to show an image in any dialog. This is optional.
When we complete all these given fields then you can see a preview of the message in your firebase console.
for example, as shown in the image below.
Target Your Message:
Now you have to select the user to whom you want to message, who has some properties.
Campaign Name: In this, we will give the name of our campaign which is not visible to the user, it is used to track the campaign.
Campaign Description (Optional): The campaign Detail property is mainly optional The description in it is not visible to the user.
Target app and other conditions: This property specifies which message to show to the user.
for example, as shown in the image below.
Message Scheduling:
Can set campaign start date and end date using message scheduling There are many more optional things in this, there is a limit on showing messages, etc.
Start time: StartTime property This is used to set the start time of the message
End time: The end time property is used to specify the end time of the message given in the campaign.
for example, as shown in the image below.
Conversion Events (Optional):
Conversion Events This is kind of an optional field it allows to set the tag for click count.
for example, as shown in the image below.
Use the last step to add some key values to add custom data which is optional.
Now you can finally publish it before publishing we can review it and make any changes and once it is published the campaign will be started.
When we run the application, we ought to get the screen’s output like the underneath screen capture.
In this article, I have explained an Explore Firebase In-App Messaging in a flutter, which you can modify and experiment with according to your own, this little introduction was from the Explore Firebase In-App Messaging demo from our side.
I hope this blog will provide you with sufficient information on Trying up the Explore Firebase In-App Messaging in your flutter project. We showed you what the Explore Firebase In-App Messagingis and work on it in your flutter applications, So please try it.
❤ ❤ Thanks for reading this article ❤❤
If I got something wrong? Let me know in the comments. I would love to improve.
Trusted across industries like manufacturing, healthcare, logistics, BFSI, and smart cities, Aeologic combines innovation with deep industry expertise to deliver future-ready solutions.
Feel free to connect with us And read more articles from FlutterDevs.com.
FlutterDevs team of Flutter developers to build high-quality and functionally-rich apps. Hire a flutter developer for your cross-platform Flutter mobile app project on an hourly or full-time basis as per your requirement! You can connect with us on Facebook, GitHub, Twitter, and LinkedIn for any flutter-related queries.
Wewelcome feedback and hope that you share what you’re working on using #FlutterDevs. We truly enjoy seeing how you use Flutter to build beautiful, interactive web experiences.
Need expert help building your Flutter app?Talk to FlutterExperts for architecture, development, and consulting support.
There are few Databases in Flutter that are fast, efficient, and easy to use but when ObjectBox made its debut in Flutter, not only list grown longer but some key points have also been sorted out like improving performance and bringing much-awaited relations support from language bindings to flutter.
For those of you new to ObjectBox: ObjectBox is a superfast NoSQL object database for Flutter / Dart and here is how you can save data in your Dart / Flutter apps
In this blog, we will learn about ObjectBox: A NoSql database for Flutter/Dart. We will also implement an ObjectBox: A NoSql database for Flutter/Dart, describe his properties. So let’s get started. so let’s get started.
Objectbox in Flutter is a very fast NoSQL database and it is optimized for very high performance on devices like mobile desktop and very lightweight database it stores all the objects.
ObjectBox Key Features:
There are some Key Features of ObjectBox are:
LIGHTSPEED: OjectBox carrying the motto of best performance and is up to the mark when it comes to delivering it, till now it has outperformed on every embedded database tested so far.
EASY OBJECT API: ObjectBox is specially designed for Mobile Applications and IoT Devices, it requires only a little bit of code as compared to SQLite with consisting of any kind of rows, columns, or SQL.
QUERYBUILDER: With ObjectBox, simply query for objects with checks at compile times; no more typos causing crashes at runtime.
OBJECT RELATIONS: In ObjectBox references and the relationship of Object are built-in, native references.
REACTIVE: Reacting to data changes is simple and powerful. Use reactive data observers from ObjectBox or integrate with RxJava.
MULTIPLATFORM: ObjectBox supports C, Android, plain-Java, Kotlin (Linux and Windows), POSIX, MacOS. Swift (iOS) is coming up soon.
INSTANT UNIT TESTING: Unit testing is with a real database is easy in ObjectBox and for this, it takes a few milliseconds, it is because of its multi-platform approach.
ROBUST TECHNOLOGY: Safe transactions and parallelism has been provided to you because of Its Multiversion Concurrency Control(MVCC) and ACID (Atomic, Consistent, Isolated, Durable) properties.
SIMPLE THREADING: Objects returned by ObjectBox within all threads. No strings attached.
SCHEMA MIGRATIONS: ObjectBox takes care of new object versions with added, removed, and renamed properties.
SYNC: ObjectBoxSynchronizes online/offline data seamlessly with simple APIs.
How fast is ObjectBox Dart?
Speed is important for data persistence solutions. Accordingly, we wanted to test how ObjectBox compares performance-wise to other Flutter Dart database options. Therefore, we looked for libraries with comparable levels of storage abstraction and feature set — so not just plain SQL/Key-value storage but also ORM-like features. There doesn’t seem to be that much choice…
We looked at two popular approaches: sqflite an SQLite wrapper for Flutter (no Dart Native support), and Hive, a key-value store with Class-adapters which seems still popular although its technology is phased out (see below). As a third alternative, we pulled in Firestore, which does not really fit as it is no local database, but would be fun to compare anyway.
ObjectBox Data Sync:
ObjectBox is a kind of out-of-box data sync way to keep our data in-sync online and offline. This outbox keeps the data up to date between devices like mobile, IoT, and cloud servers, and this ObjectBox when the client comes back online Automatically updates this change.
Implementation :
You need to implement it in your code respectively :
Step 1: Add dependencies.
Add dependencies to pubspec — yaml file.
dependencies:
objectbox: ^0.11.0 objectbox_flutter_libs: any path_provider: ^1.6.27
Step 3: Run flutter packages get in the root directory of your app.
Code Implementation :
Firstly to implement the database we will create a model class that will have @Entity() annotation and use it later to get the bindings required by ObjectBox.
Here is how lib/model/person_model.dart looks in my case:
import 'package:objectbox/objectbox.dart';

@Entity()
class PersonDetail {
String name;
String lastName;
int personAge;
int id;

PersonDetail({this.name, this.lastName, this.personAge});
}
You can notice that I have left the id parameter out of the class constructor. The reason for this is that objectbox will dynamically allocate a new id for the model class and we don’t need to worry about manually incrementing it after every operation.
Once you have implemented your model class, run the build_runner so that the objectbox can generate the required binding files.
After this, we have created a helper class in which we have defined the Person Details in which we can insert the name of the person and all his details and with the help of his id we can delete his details and update it as That we have given below reference of the code like delete insert and update.
class Helpers {

static Future<int> insert(PersonDetail person) async {
var store = await ObjectBoxStore.getStore();
var box = store.box<PersonDetail>();
return box.put(person);
}

static Future<bool> delete(int id) async {
var store = await ObjectBoxStore.getStore();
var box = store.box<PersonDetail>();
return box.remove(id);
}

static Future<PersonDetail> queryPerson(int id) async {
var store = await ObjectBoxStore.getStore();
var box = store.box<PersonDetail>();
return box.get(id);
}
}
Code File :
import 'dart:developer';

import 'package:flutter/material.dart';
import 'package:flutter_objectbox_demo/helpers/helpers.dart';
import 'package:flutter_objectbox_demo/model/person_model.dart';
class ObjectBoxDemo extends StatefulWidget {
@override
_ObjectBoxDemoState createState() => _ObjectBoxDemoState();
}

class _ObjectBoxDemoState extends State<ObjectBoxDemo> {
@override
Widget build(BuildContext context) {
return Scaffold(
appBar: AppBar(
title:Text('Object Box Demo'),
),
body: Column(
mainAxisAlignment: MainAxisAlignment.center,
children: [
RaisedButton(
child: Text('INSERT'),
onPressed: () async {
var person =
PersonDetail(name: "Mac", lastName: "anthony", personAge: 25);
int id = await Helpers.insert(person);
print("Sucessfull inserted an object with $id");
},
),
SizedBox(height:20,),
RaisedButton(
child: Text('UPDATE'),
onPressed: () async {
var person = await Helpers.queryPerson(1);
person.name = 'Sam';
person.lastName = 'david';
person.personAge = 30;
int id = await Helpers.insert(person);
print("Sucessfull updated an object with $id");
},
),

SizedBox(height:20,),
RaisedButton(
child: Text('DELETE'),
onPressed: () async {
bool deleted = await Helpers.delete(1);
if (deleted) {
print("Sucessfull deleted an object with id :1");
}
},
),
],
),
);
}
}
Conclusion :
In this article, I have explained ObjectBox: A NoSql database for Flutter/Dart?, which you can modify and experiment with according to your own, this little introduction was from the ObjectBox: A NoSql database for Flutter/Dart?.
I hope this blog will provide you with sufficient information on Trying up the ObjectBox: A NoSql database for Flutter/Dart? in your flutter project. We ObjectBox: A NoSql database for Flutter/Dart? is and work on it in your flutter applications, So please try it.
❤ ❤ Thanks for reading this article ❤❤
If I got something wrong? Let me know in the comments. I would love to improve.
Trusted across industries like manufacturing, healthcare, logistics, BFSI, and smart cities, Aeologic combines innovation with deep industry expertise to deliver future-ready solutions.
Feel free to connect with us And read more articles from FlutterDevs.com.
FlutterDevs team of Flutter developers to build high-quality and functionally-rich apps. Hire a flutter developer for your cross-platform Flutter mobile app project on an hourly or full-time basis as per your requirement! You can connect with us on Facebook, GitHub, Twitter, and LinkedIn for any flutter-related queries.
Wewelcome feedback and hope that you share what you’re working on using #FlutterDevs. We truly enjoy seeing how you use Flutter to build beautiful, interactive web experiences.
Need expert help building your Flutter app?Talk to FlutterExperts for architecture, development, and consulting support.
What is Inheritance? Let’s assume that there is a functionality that is used on every screen of the app or in a majority of screens of the app, what you will prefer to implement this functionality writing code once or making a method with the required parameters and using that method in every screen by calling it simple. Of course, we would prefer code reusability, that’s called inheritance.
Now, if there is a class that requires more than one class property, it is not possible to extend that class to more than one class. So to avoid such inheritance ambiguity we require mixins. Mixins are really great in dart as they provide us flexibility for code reusability.
mixins are normal classes whose method can be used in another class without extending the class. In dart, we can do this by using the keyword with.
In this blog, we shall learn how we build a mixin in a flutter that records the time spend on a particular screen. This functionality is very important if we are using analytics in our app to track the user’s behavior.
Why we require a mixin to do this? Let’s say there are 50 screens in an app and we want to implement a timer in every screen then we need to write code for the timer on every screen if we do such a thing then it is not a good practice as we are using the same code in every screen again and again. So we can create a mixin for it.
Create a mixin named TimerMixin .
mixin TimerMixin {}
We will create two methods startTimer and disposeTimer which will start the timer and stop the timer.
To keep on increasing the duration value every second, we can use the Timer periodic property to execute a reoccurring function. It takes a duration property and a callback that takes Timer . Inside the callback, we can add the timer tick into a List.
timerData.clear();why we need this?
Let’s assume that the user keeps the screen open for a longer period of time in this case the List size will be increased a lot, so to maintain the space complexity we are removing all the elements from the List and storing the next element in it.
disposeTimer the method will be executed when the screen disposes of it. This method will take the integer stored in the timerDataand parse it to an hour, min, and second.
The home page will contain a simple button in the center, on pressing it the user will be navigated to the new page, and on navigating back to the home page from the new page the duration spent by the user on the new page will be displayed on the run console.
Trusted across industries like manufacturing, healthcare, logistics, BFSI, and smart cities, Aeologic combines innovation with deep industry expertise to deliver future-ready solutions.
Feel free to connect with us: And read more articles fromFlutterDevs.com
FlutterDevs team of Flutter developers to build high-quality and functionally-rich apps. Hire a flutter developer for your cross-platform Flutter mobile app 987tr project on an hourly or full-time basis as per your requirement! You can connect with us on Facebook, GitHub, Twitter, and LinkedIn for any flutter-related queries.
Wewelcome feedback and hope that you share what you’re working on using #FlutterDevs. We truly enjoy seeing how you use Flutter to build beautiful, interactive web experiences!.
Flutter has made it quite easy to develop complex UIs for developers. Flutter is a very performant app development framework that is written in Dart. It interacts efficiently and very easily on a native device. It is supported by Google. Flutter automated testing empowers you to meet high responsiveness in your application as it helps in discovering bugs and various issues in your application. A flutter is a tool for developing mobile, desktop, web applications with code & is a free and open-source tool.
Hello friends In this blog, we will learn about How to integrate flutter into the existing android app?. In this, we will see how we will integrate any Flutter app in Android. so let’s get started.
Flutter provides us with a platform to develop apps for Android and iOS. Using Flutter we can integrate modules of our Flutter project into any existing native projects. After integrating the Flutter project we can also develop the rest of the Flutter application and it will be automatically reflected in the parent projects.
Add Flutter to an existing Android app:
Flutter allows us to do a few things already integrated into Android apps which are explained below:
This is a module build wizard that allows co-editing Android projects and Flutter projects in our Android Studio.
It supports both types of apps like our Kotlin Java
It can integrate and conform to the plugins in flutter and the flutter modules can be integrated seamlessly and as soon as we add the flutter SDK hooks in our Gradle file it auto builds the flutter modules we have created. and allows it to be important Flutter plugins can integrate and conform to the preexisting platform and how Flutter modules can then be seamlessly integrated as a result.
Once we have integrated flutter you can also use flutter attach to the id so that we can connect to the app
Example of an existing application:
Following are the steps to integrate Flutter Project in Android Project.
Step 1:First of all we will open an android studio and for a new android project, we will select a new android studio project.
Step2:Now we can first create a screen from the android studio template with the help of the attached MVVM, name it whatever.
like you do in your android studio, select File>New>New project… and choose a template.
Step3:Now we see in the next step as soon as the android project is created a new android project opens now as soon as we run the project then a hello word written appears on the screen which is the default.
Step4:Now we will close and run our android project again before that we will create a project and select a flutter module in it in which we will set the project name and its SDK path, project location, etc.
Step5:When we create a new flutter project and run our project, some kind of output appears, which is shown in the image below.
Step6:Now we will open our android project again and right-click on our project, on right-click a dialog will open in this we will move the new section cursor and click on the module option.
Step7:As soon as we click on the module, create a new module comes, in this, we will select the option of import flutter module, in we will set the path of our flutter project and click on the finish button, which will import our flutter module.
Step8:The structure of our project changes as soon as the Flutter module is imported, we see that the Flutter project is also inbuilt in our Android project.
Now our native Android and Flutter Project is successfully integrated.
Implement:
Flutter provides FlutterActivity inside the android app that simulates the flutter experience. We need to register flutter activity in AndroidManifest.xml.
You need to implement it in your code respectively:
First, we add Activity. Main. A button has been created in XML in which the name and id of the button have been given, which will help us to perform any action on the button. As below code is given in the reference.
Next, we will define the android activity inside button in the main activity class which integrates the flutter project inside our android app it maintains its responsibilities like displaying the splash screen of android and flutter. As below code is given in the reference.
public class MainActivity extends AppCompatActivity {
In this article, I have explained How to integrate flutter to the existing android app?, which you can modify and experiment with according to your own, this little introduction was from the How to integrate flutter to the existing android app?.
I hope this blog will provide you with sufficient information on Trying up the How to integrate flutter into the existing android app. How to integrate flutter to the existing android app? is and work on it in your flutter applications, So please try it.
❤ ❤ Thanks for reading this article ❤❤
If I got something wrong? Let me know in the comments. I would love to improve.
Trusted across industries like manufacturing, healthcare, logistics, BFSI, and smart cities, Aeologic combines innovation with deep industry expertise to deliver future-ready solutions.
Feel free to connect with us And read more articles from FlutterDevs.com.
FlutterDevs team of Flutter developers to build high-quality and functionally-rich apps. Hire a flutter developer for your cross-platform Flutter mobile app project on an hourly or full-time basis as per your requirement! You can connect with us on Facebook, GitHub, Twitter, and LinkedIn for any flutter-related queries.
Wewelcome feedback and hope that you share what you’re working on using #FlutterDevs. We truly enjoy seeing how you use Flutter to build beautiful, interactive web experiences.
Need expert help building your Flutter app?Talk to FlutterExperts for architecture, development, and consulting support.
Google’s Flutter is a very attractive app development platform. It allows to development of apps like android ios etc. based on a single codebase. It is compiled in machine language for its great performance. It is built with Dart language. As we create an app in Flutter in which we want to do localization, then we load it using the localization widget to see all the objects in which we have a collection of localized objects. ‘flutter_localizations’ library is used to set up localization in Flutter.
Hello friends, I will talk about my new blog on Localization / Multi-Language In Flutter. We will also implement a Localization / Multi-Language In Flutter. describe his properties, and use them in your flutter applications. So let’s get started.
The Flutter localization widget is used to view and load objects from a collection of localized values. If we create an application and want to increase the use of the application, we have to support multiple languages in our apps.
With the help of localization, we can change the language of our application as android and ios is the most popular operating system of mobile so we using flutter localization will show localization on both types of device and will be localized for both field
Some Basic requirements of multiple languages.
Flutter localization application works by default according to the language configured in the smartphone.
If a language is not supported in the application, then English is the (en)default language of the language.
The end-user can change the working language from a list of supported languages.
When the user selects any of the other languages, the entire layout of the application is refreshed to display the values for the chosen language
Implementation :
You need to implement it in your code respectively :
Step 1: Add dependencies.
Add dependencies to pubspec — yaml file.
First, we will add flutter_localization and intl library to pubspec. yaml.
Create a new dart file calledflutter_localization_demo inside the lib folder.
First, we create a dart file named l10n of the l10n package in which arb file initializes the to local list which contains all our languages which we provide in our project.
We have app_in. arb defines its language, which is a type of localization code, as an arb file is a kind of translator toolkit that is used as an input to a translation tool.
For Example:
app_en.arb, app_es.arb, app_id.arb, app_it.arb
We have initialized the English language in the app_en.arb file regarding the code given below.
After this, we will create a class named FlutterLocalizationDemo inside which we are using a dropdown button inside which we will set the value in our widget text and we have created a function named title which we will set the title of the language in which the language code, Country code, etc can be anything as soon as we select the language in the dropdown it will also change our given title.
In this article, I have explained Localization / Multi-Language In Flutter, which you can modify and experiment with according to your own, this little introduction was from the Localization / Multi-Language. In the Flutter demo from our side.
I hope this blog will provide you with sufficient information in Trying up the Localization / Multi-Language In Flutter. In Flutter in your flutter project. We showed you what the Localization / Multi-Language In Flutter is and work on it in your flutter applications, So please try it.
❤ ❤ Thanks for reading this article ❤❤
If I got something wrong? Let me know in the comments. I would love to improve.
Trusted across industries like manufacturing, healthcare, logistics, BFSI, and smart cities, Aeologic combines innovation with deep industry expertise to deliver future-ready solutions.
Feel free to connect with us And read more articles from FlutterDevs.com.
FlutterDevs team of Flutter developers to build high-quality and functionally-rich apps. Hire a flutter developer for your cross-platform Flutter mobile app project on an hourly or full-time basis as per your requirement! You can connect with us on Facebook, GitHub, Twitter, and LinkedIn for any flutter-related queries.
Wewelcome feedback and hope that you share what you’re working on using #FlutterDevs. We truly enjoy seeing how you use Flutter to build beautiful, interactive web experiences.
Need expert help building your Flutter app?Talk to FlutterExperts for architecture, development, and consulting support.
Flutter is a mobile framework that helps to modernize both iOS and Android app from a single codebase. It is a combination of stateful and stateless widgets. Like all frameworks, Flutter also has a lifecycle associated with all the apps that our Flutter app uses. is managed by lifecycle In this article, we will take a look at different types of apps available in the flutter app, lifecycle.
In this article, we will explore the Widget Lifecycle in Flutter. We will also implement a Widget Lifecycle demo, describe its properties, and use them in your flutter applications. So let’s get started.
“ Flutter is Google’s UI toolkit that helps you build beautiful and natively combined applications for mobile, web, and desktop in a single codebase in record time, Flutter offers great developer tools, with amazing hot reload”
Widget Lifecycle :
Everything in Flutter is a Widget, so before knowing about Lifecycle, we should know about Widgets in Flutter.
There are two types of widgets in Flutter.
Stateless Widgets.
Stateful Widgets.
Before knowing about the Lifecycle, we need to understand the difference between the two widgets.
=> Stateless Widgets: Stateless Widgets in Flutter are those widgets whose state once created cannot be changed, it becomes immutable like on variables, buttons, icons, etc., or any state that cannot be changed on the app to retrieve data. Returns a widget by overwriting the build method. We use it when the UI relies on the information inside the object itself.
=> Stateful Widget: A Stateful widget maintains data and responds to whatever the data does inside the application. It is a mutable widget, so it is drawn multiple times in its lifetime.
We use this when the user dynamically updates the application screen. This is the most important of all the widgets, as it has a state widget, everyone knows that something has been updated on our screen.
=> A stateful widget has the following lifecycle stages:
Widget Lifecycle Methods:
The life cycle is based on the state and how it changes. A stateful widget has a state so we can explain the life cycle of flutter based on it. Stage of the life cycle:
createState
initState()
didChangeDependencies()
build()
didUpdateWidget()
setState()
deactivate()
dispose()
> initState(): Flutter’s initState() method is the first method that is used while creating a stateful class, here we can initialize variables, data, properties, etc. for any widget.
int a;
@override
void initState() {
a= 0;
super.initState();
}
> createState(): When we create a stateful widget, our framework calls a createState() method and it must be overridden.
> build(): The build method is used each time the widget is rebuilt. This can happen either after calling initState, didChangeDependencies, didUpdateWidget, or when the state is changed via a call to setState
> didUpdateWidget(): This method is called whenever the widget configuration changes. A typical case is when a parent passes some variable to the children() widget via the constructor.
> deactivate(): It is used when the state is removed from the tree but before the current frame change can be re-inserted into another part of the tree
> dispose(): We use this method when we remove permanently like should release resource created by an object like stop animation
@override
dispose() {
animationController.dispose(); // you need this
super.dispose();
}
Implement:
You need to implement it in your code respectively:
Create a new dart file calledwidget_lifecycle_demo inside the lib folder.
Now we first took a dart file as I have mentioned above and before the build method we have defined an integer type variable whose variable name is _counter, after that I have created an increment counter method inside it in setState() Defines a _counter variable that is of increment type.
In this, we have called the method initState(),didChangeAppLifecycleState(), deactivate() etc. As soon as our app is created it will print a message in the accordion console of its lifecycle.
After this, we have taken the column widget inside the build method inside which the increment value is defined inside a text and in it we have taken a FloatingActionButton() which is of increment type, pressing which will increase the value of the counter.
In this article, I have explained an Explore Widget Lifecycle in a flutter, which you can modify and experiment with according to your own, this little introduction was from the Explore Widget Lifecycle.
I hope this blog will provide you with sufficient information on Trying up the Explore Widget Lifecycle in your flutter project. We showed you the Explore Widget Lifecycle and worked on it in your flutter applications, So please try it.
❤ ❤ Thanks for reading this article ❤❤
If I got something wrong? Let me know in the comments. I would love to improve.
Trusted across industries like manufacturing, healthcare, logistics, BFSI, and smart cities, Aeologic combines innovation with deep industry expertise to deliver future-ready solutions.
Feel free to connect with us And read more articles from FlutterDevs.com.
FlutterDevs team of Flutter developers to build high-quality and functionally-rich apps. Hire a flutter developer for your cross-platform Flutter mobile app project on an hourly or full-time basis as per your requirement! You can connect with us on Facebook, GitHub, Twitter, and LinkedIn for any flutter-related queries.
Need expert help building your Flutter app?Talk to FlutterExperts for architecture, development, and consulting support.
Flutter widget is built using a modern framework. It is like a react. In this, we start with the widget to create any application. Each component in the screen is a widget. The widget describes what his outlook should be given his present configuration and condition. Widget shows were similar to its idea and current setup and state.
Flutter automated testing empowers you to meet high responsiveness in your application as it helps in discovering bugs and various issues in your application. A Flutter is a tool for developing mobile, desktop, web applications with code & is a free and open-source tool.
Hello friends In this blog, we will learn about Under the hood rendering in flutter?. In this, we will see how Flutter provides an overview of the architecture and how to execute dart’s code behind the scenes in mobile. so let’s get started.
The rendering layer in the flutter is an abstraction dealing with the layout. This lets you build a tree of objects to render. All of these objects can be dynamically manipulated. The tree detects our objects and automatically updates the layout for its changes.
Flutter widgets are reactive. They respond to any new information from an outside source. Consider a Stateful component as a parent to another Stateless component.
In that case whenever one of the states on which the stateless component was relying on changes, the widget calls didUpdateWidget life cycle method and repaints if necessary. For example:
There are mainly three layers in the architecture of Flutter, each layer has a set of libraries, let us see them in detail.
Framework
Engine
Embedder
=> Framework: To interact with Flutter, developers use the Framework layer, which is written in the Dart language. It provides a modern responsive framework. It consists of a variety of components. It includes high-level widgets such as animations, rendering logic, etc. Cupertino also provides libraries such as Material that help implement iOS designs and Material Design.
Components of Framework:
Foundation: It’s a kind of basic foundation class that provides building blocks such as painting, animation gestures.
Widgets: Use of Widgets we provide whatever its related widget is in making the layout, in the same way, everything in Flutter is a widget.
Material & Cupertino: Material and Cupertino widgets are used to create layouts and convert the design of iOS.
=> Engine: Flutter’s engine is written mostly C/C++. It provides low-level implementations of Flutter’s core API, including graphics, text layout, plugin architecture, file, and network I/O, accessibility support, and the dart runtime compile toolchain. responsible for running the compiled dart code on the engine’s device with the help of dart runtime.
=> Embedder: Flutter Embedder provides the entry point for a platform-specific Flutter app. It receives a thread for the Flutter UI and it also initializes the Flutter engine. Using embedder, we can integrate Flutter’s code into the existing application as a module. Maybe the code of the ambassador is written in a language that is suitable for the platform.
For Example:
Embedder Java and C++ for Android, Embedder Objective-C/Objective-C++ for iOS and macOS, and K++ for Windows and Linux.
Let’s go through this rendering stepwise manner:
Now our application calls the setState() method in the iconButton.onPressed() callback.
Flutter then finds that the state value inside it is completely updated and needs to be recreated.
New Widget Widget Tree replaces the old one after the update After updating the New Widget widget tree replaces the old one and then renders the new one.
Rendering Pipeline(User Input):
It describes the rendering pipeline that the Flutter rendering engine takes when rendering objects. How the data flows through the system is shown in a diagram.
Animation: In Flutter Animation, Flutter first starts an animation ticker and then stops the Flutter rendering process as we scroll down the list of any item to move the list of items for such a scenario. We can control this by animation tricker. and determines the time when any element is moved.
Build: The build method builds the widget tree, taking into account the different configurations of the widget while building it, this means how the widget will look on our screen Widgets handle the same configuration that is applied to the screen.
Layout: As soon as our widget is built, it starts thinking about the process of layout, it is a way to efficiently determine the part of the important widgets within the UI framework. Has the ability to determine the size and position of the layout before displaying it on the screen The render tree creates a base class for each that defines an abstract model for the layout
Paint: Flutter gets an idea of the constraints of all the widgets then it can paint the entire widget to make sure there are conflicts.
Composting: In this step, we will see that Composting Flutter displays the actual widget coordinates on the screen. There are many reasons that keep it apart from painting. Instead of building up your entire list when someone scrolls or closes it on the new screen, Flutter can pre-draw it and plug it in where they need to go
How to run flutter code runs on the device:
Below is a simplistic representation of how the dart code runs on the device.
Before the code is run in Dart, first of all, the code of Dart is compiled into the Arm library code.
After this, the compiled code is embedded in the APK or IPA file.
Now when we open the app flutter embedder code is started and it starts the app.
Conclusion:
In this article, I have explained an Under The Hood Rendering in a flutter, which you can modify and experiment with according to your own, this little introduction was from the Under The Hood Rendering.
I hope this blog will provide you with sufficient information on Trying up the Under The Hood Rendering in your flutter project. We showed you the Explore Under The Hood Rendering and worked on it in your flutter applications, So please try it.
❤ ❤ Thanks for reading this article ❤❤
If I got something wrong? Let me know in the comments. I would love to improve.
Trusted across industries like manufacturing, healthcare, logistics, BFSI, and smart cities, Aeologic combines innovation with deep industry expertise to deliver future-ready solutions.
Feel free to connect with us And read more articles from FlutterDevs.com.
FlutterDevs team of Flutter developers to build high-quality and functionally-rich apps. Hire a flutter developer for your cross-platform Flutter mobile app project on an hourly or full-time basis as per your requirement! You can connect with us on Facebook, GitHub, Twitter, and LinkedIn for any flutter-related queries.
Flutter is a portable UI toolkit. In other words, it’s a comprehensive app Software Development toolkit (SDK) that comes complete with widgets and tools. Flutter is a free and open-source tool to develop mobile, desktop, web applications. Flutter is a cross-platform development tool. This means that with the same code, we can create both ios and android apps. This is the best way to save time and resources in our entire process. In this, hot reload is gaining traction among mobile developers. Allows us to quickly see the changes implemented in the code with hot reload.
Flutter Management Version allows different types of flutter versions to be available on a project basis. This means that we can define specific types of flutter versions for different types of projects, it allows us to release multiple channels, cache it locally, so switch versions. then we don’t have to wait for setup.
In this article, we will learn about Version Management In Flutter. In this, we will see how to set up work Version Management in a flutter. so let’s get started. so let’s get started.
When we work on our flutter project, we need to release the updated flutter and the app, verify it, and switch different types of SDK to test it, which takes us time for development. To avoid this, we use Flutter Version Management, which provides us with different types of Flutter versions for our machines. So that each time Flutter can test the app against the updated Flutter release without waiting for installation and will be able to switch to the Flutter version accordingly.
FVM Install:
First of all, we need to make sure that flutter is already installed and whether the flutter is the stable channel. if not then Type the below code in your command line.
// set flutter to stable channel
flutter channel stable// check flutter channel
flutter channel// output
Flutter channels:
master
dev
beta
* stable
After this, we have to determine whether our flutter is already installed or not, if not then first we will install FVM.
$ pub global activate fvm
We will now see that some warnings are given at the end of the installation process, so we need to add the fvm path to the shell configuration file (.bashrc, bash_profile, etc.) before taking the next step
DVM allows us to install multiple types of flutter release or channels To install the channel use stable and to install the release version of flutter we will use v2.0.5 or 1.17.0-dev.3.1 and as soon as we run — skip-setup after that it will skip the setup
$ fvm install stable or fvm install 2.0.5
Project Config SDK Version:
After that, we will see that Whether the project is configured to use a specific version or not, if not, we will install it on the appropriate version without arguments.
$ fvm install
Flutter Installed Versions List:
Now by typing in the following command we can list the installed version on our machine by using the below command FVM will store the SDK version.
$ fvm list
Upgrade SDK Version:
Using upgrade SDK version command when we need to upgrade our current SDK version so you have to call command of your flutter SDK as in normal flutter installation.
$ fvm flutter upgrade
Set Up IDE:
Now we will see how to configure IDE, below we have shown how to configure in the android studio and vs code let’s see it now.
=> Android Studio:
In Your root project directory copy the absolute following symbolic link.
After that we will open Languages and Frameworks in the menu of Android Studio -> Now search for flutter or flutter and change the path to flutter SDK. and implement the change. Now you can run it with selected versions of flutter and debug it. If you want to see the new setting made then we can use Android Studio will restart again.
=> VS Code:
Now we will configure VS Code here we will see how to complete the VS Code process.
We can see all the installed versions by FVM in the code by providing the path to the flutter SDK version directory.
After that press, Cmd + then go to Settings.json and paste the below path.
To get the above path we will execute the fvm list command.
// copy this path
Versions path: $YOUR_PATH/fvm/versions
After that type cmd + shift + p to use the sdk and type change sdk now and now you can choose your preferred version.
Conclusion:
In this article, I have explained Version Management in a flutter, which you can modify and experiment with according to your own, this little introduction was from the Version Management In Flutter.
I hope this blog will provide you with sufficient information on Trying up the Version Management In Flutter. We showed you the Explore Version Management In Flutter and worked on it in your flutter applications, So please try it.
❤ ❤ Thanks for reading this article ❤❤
If I got something wrong? Let me know in the comments. I would love to improve.
Trusted across industries like manufacturing, healthcare, logistics, BFSI, and smart cities, Aeologic combines innovation with deep industry expertise to deliver future-ready solutions.
Feel free to connect with us And read more articles from FlutterDevs.com.
FlutterDevs team of Flutter developers to build high-quality and functionally-rich apps. Hire a flutter developer for your cross-platform Flutter mobile app project on an hourly or full-time basis as per your requirement! You can connect with us on Facebook, GitHub, Twitter, and LinkedIn for any flutter-related queries.